Introduction
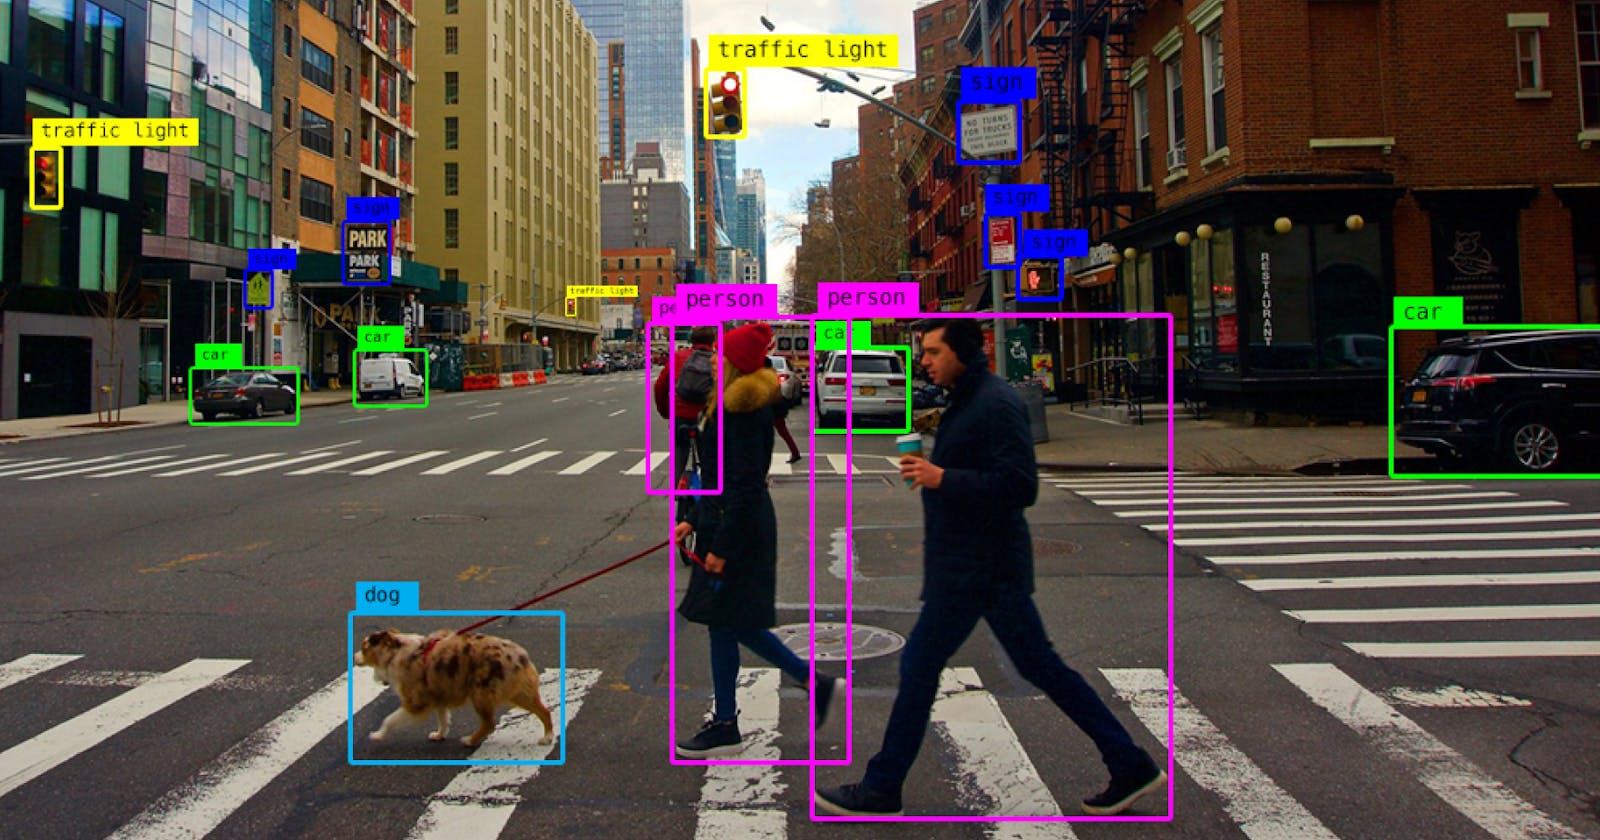
MediaPipe (https://developers.google.com/mediapipe) is a powerful framework that allows developers to easily apply machine learning solutions to their apps. One of the solutions offered by MediaPipe is object detection, which can be used to detect and recognize objects in images and videos.
Let's take a closer look at how to use MediaPipe's object detection solution in a web app, and how to bundle it as a service using InversifyJS (https://github.com/inversify/InversifyJS).
The full source code can be found in rsachira/media-pipe-test (github.com).
Object detection with MediaPipe

Here, we will be implementing the MediaPipe object detector as an InversifyJS service. InversifyJS is a powerful and lightweight inversion of control (IoC) container that can help you manage your code's dependencies by allowing you to define and organize them in one place, making your code more modular, testable, and maintainable.
First, let’s define the abstractions.
export interface DetectedObject {
    x: number,
    y: number,
    width: number,
    height: number,
    name: string,
    score: number
};

export interface IObjectDetector {
    detectObjects: (imageOrVideo: HTMLImageElement | HTMLVideoElement) => DetectedObject[]
};
We need our object detector to expose a detectObject method which can take either an image or a video as input and return to us the detected objects. We need the returned detected objects to contain their coordinates (x, y), width, and height, to draw the bounding boxes. We also need the name of the object and the confidence score to display within the bounding boxes.
Now we are ready to write our object detector which implements the above interface.
export class EfficientNetLiteDetector implements IObjectDetector {
 // Implementation of the object detector which uses the EfficientNetLite model.
}
Methods of the EfficientNetLiteDetector class are explained below.
Building the object detector requires asynchronous operations such as pulling the model checkpoint and MediaPipe web assembly runtime. Therefore, we cannot use a constructor to build the object detector.
We will use a private constructor to prevent outside code from trying to initialize our class.
private constructor(
    private readonly objectDetector: ObjectDetector,
    private readonly runningMode: RunningMode,
) {}
We will instead use a static method to initialize a new instance of our class.
type RunningMode = 'IMAGE' | 'VIDEO'; // Custom type outside the class
...

public static async create(runningMode: RunningMode) {
    const visionFilesetResolver = await FilesetResolver.forVisionTasks(
        "<https://cdn.jsdelivr.net/npm/@mediapipe/tasks-vision@latest/wasm>"
    );
    const objectDetector = await ObjectDetector.createFromOptions(visionFilesetResolver, {
        baseOptions: {
            modelAssetPath: "<https://storage.googleapis.com/mediapipe-models/object_detector/efficientdet_lite0/int8/latest/efficientdet_lite0.tflite>"
        },
        scoreThreshold: 0.3,
        runningMode: runningMode
    });

    return new EfficientNetLiteDetector(objectDetector, runningMode);
}
This code snippet creates an instance of the MediaPipe object detector using the ObjectDetector.createFromOptionsmethod. This method initializes the MediaPipe web assembly (WASM) runtime and creates a new object detector from the provided options. visionFilesetResolver loads the WASM Single Instruction, Multiple Data (SIMD) files.
The second argument to the ObjectDetector.createFromOptions method is an options object that specifies the model asset path, score threshold, and running mode for the object detector. The model asset path is a URL to a TensorFlow EfficientNetLite model file for object detection. The score threshold specifies the minimum confidence score at which the objects are detected. The running mode specifies whether the detector should run on a video (compatible with HTMLVideoElement) or on an image (compatible with HTMLImageElement).
Now we are ready to write our detectObjects method.
public detectObjects(imageOrVideo: HTMLImageElement | HTMLVideoElement): DetectedObject[] {
    if (imageOrVideo instanceof HTMLImageElement) {
        return this.detectObjectsInImage(imageOrVideo);
    }

    return this.detectObjectsInVideo(imageOrVideo);
}

private detectObjectsInImage(image: HTMLImageElement): DetectedObject[] {
    if (this.runningMode !== 'IMAGE') {
        throw new Error('Wrong running mode. Set the running mode to IMAGE');
    }

    if (this.objectDetector === undefined) {
        return [];
    }

    const { detections } = this.objectDetector.detect(image);

    return this.detectionsToDetectedObjects(detections);
}

private detectObjectsInVideo(video: HTMLVideoElement): DetectedObject[] {
    if (this.runningMode !== 'VIDEO') {
        throw new Error('Wrong running mode. Set the running mode to VIDEO');
    }

    if (this.objectDetector === undefined) {
        return [];
    }

    const { detections } = this.objectDetector.detectForVideo(video, performance.now());

    return this.detectionsToDetectedObjects(detections);
}

private detectionsToDetectedObjects(detections: Detection[]) {
    return detections.filter(value => value.boundingBox !== undefined).map<DetectedObject>(detection => ({
        x: detection.boundingBox?.originX as number,
        y: detection.boundingBox?.originY as number,
        width: detection.boundingBox?.width as number,
        height: detection.boundingBox?.height as number,
        name: detection.categories[0].categoryName,
        score: detection.categories[0].score
    }));
}
detectObjects method is quite simple. Based on the input provided, it should either detect objects in an image or in a video sequence.
The provided code snippet includes two private methods for object detection: detectObjectsInImage and detectObjectsInVideo. The detectObjectsInImage method takes an HTMLImageElement as input and checks if the running mode is set to 'IMAGE'. If so, it proceeds to detect objects using the objectDetector.detect(...) method and returns the detected objects after converting them using the detectionsToDetectedObjects method.
Similarly, the detectObjectsInVideo method handles object detection in videos. It takes an HTMLVideoElement as input, verifies the running mode is set to 'VIDEO', and then utilizes the objectDetector instance to detect objects in the video by calling the detectForVideo method. The detected objects are extracted from the result and converted using detectionsToDetectedObjects.
Detected objects are converted from the MediaPipe proprietary output type to a generic type with the information we need as follows.
private detectionsToDetectedObjects(detections: Detection[]) {
    return detections.filter(value => value.boundingBox !== undefined).map<DetectedObject>(detection => ({
        x: detection.boundingBox?.originX as number,
        y: detection.boundingBox?.originY as number,
        width: detection.boundingBox?.width as number,
        height: detection.boundingBox?.height as number,
        name: detection.categories[0].categoryName,
        score: detection.categories[0].score
    }));
}
The object detector service is registered with the InversifyJS container as shown below.
import { Container } from "inversify";
import { IObjectDetector, DetectedObject, EfficientNetLiteDetector } from "./object-detector";

type Provider<T> = () => Promise<T>;

const TYPES = {
    IObjectDetector: Symbol.for("IObjectDetector").toString()
};

const container = new Container();
container.bind<Provider<IObjectDetector>>(TYPES.IObjectDetector).toProvider<IObjectDetector>(context => {
    return () => EfficientNetLiteDetector.create('VIDEO');
});

export {
    container,
    TYPES,
    type Provider,
    type IObjectDetector,
    type DetectedObject,
};
Building the web application with React
To create a simple web app, we can start by using the create-react-app script (https://create-react-app.dev/). This script sets up the basic structure and dependencies for a React application. Next, we can enhance the user interface by incorporating Bootstrap styling. The react-bootstrap library (https://react-bootstrap.netlify.app/) provides a set of pre-designed components and styles that can be easily integrated into our app. To access the webcam functionality, we can utilize the react-webcam package (https://www.npmjs.com/package/react-webcam). This package allows us to interact with the user's webcam within our web application.
Webcam object detector component
import React, {useRef, useState, useEffect} from 'react';
import Webcam from 'react-webcam';
import { DetectedObject, IObjectDetector, Provider, TYPES, container } from '../../services';
import { Button } from "react-bootstrap";

interface WebcamObjectDetectorProps {
    onDetect: (offsetX: number, offsetY: number, ratio: number, detections: DetectedObject[]) => void;
}

function WebcamObjectDetector({ onDetect }: WebcamObjectDetectorProps) {
    const [isDetectionStarted, setDetectionStarted] = useState(false);
  const webcamRef = useRef<Webcam>(null);
    const animationRef = useRef<number | undefined>(undefined);

    // Implementation of some of the functions and variables are described separately below.
    ...

    const toggleDetection = () => {
        setDetectionStarted(!isDetectionStarted);
    }

    const enabledDetectionView = (
        <>
            <Webcam ref={webcamRef} onUserMedia={startDetection} />
            <Button onClick={toggleDetection}>Stop Detection</Button>
        </>
    );

    const disabledDetectionView = (
        <>
            <Button onClick={toggleDetection}>Start Detection</Button>
        </>
    );

    return (
        <>
            {isDetectionStarted ? enabledDetectionView : disabledDetectionView}
        </>
    );
}
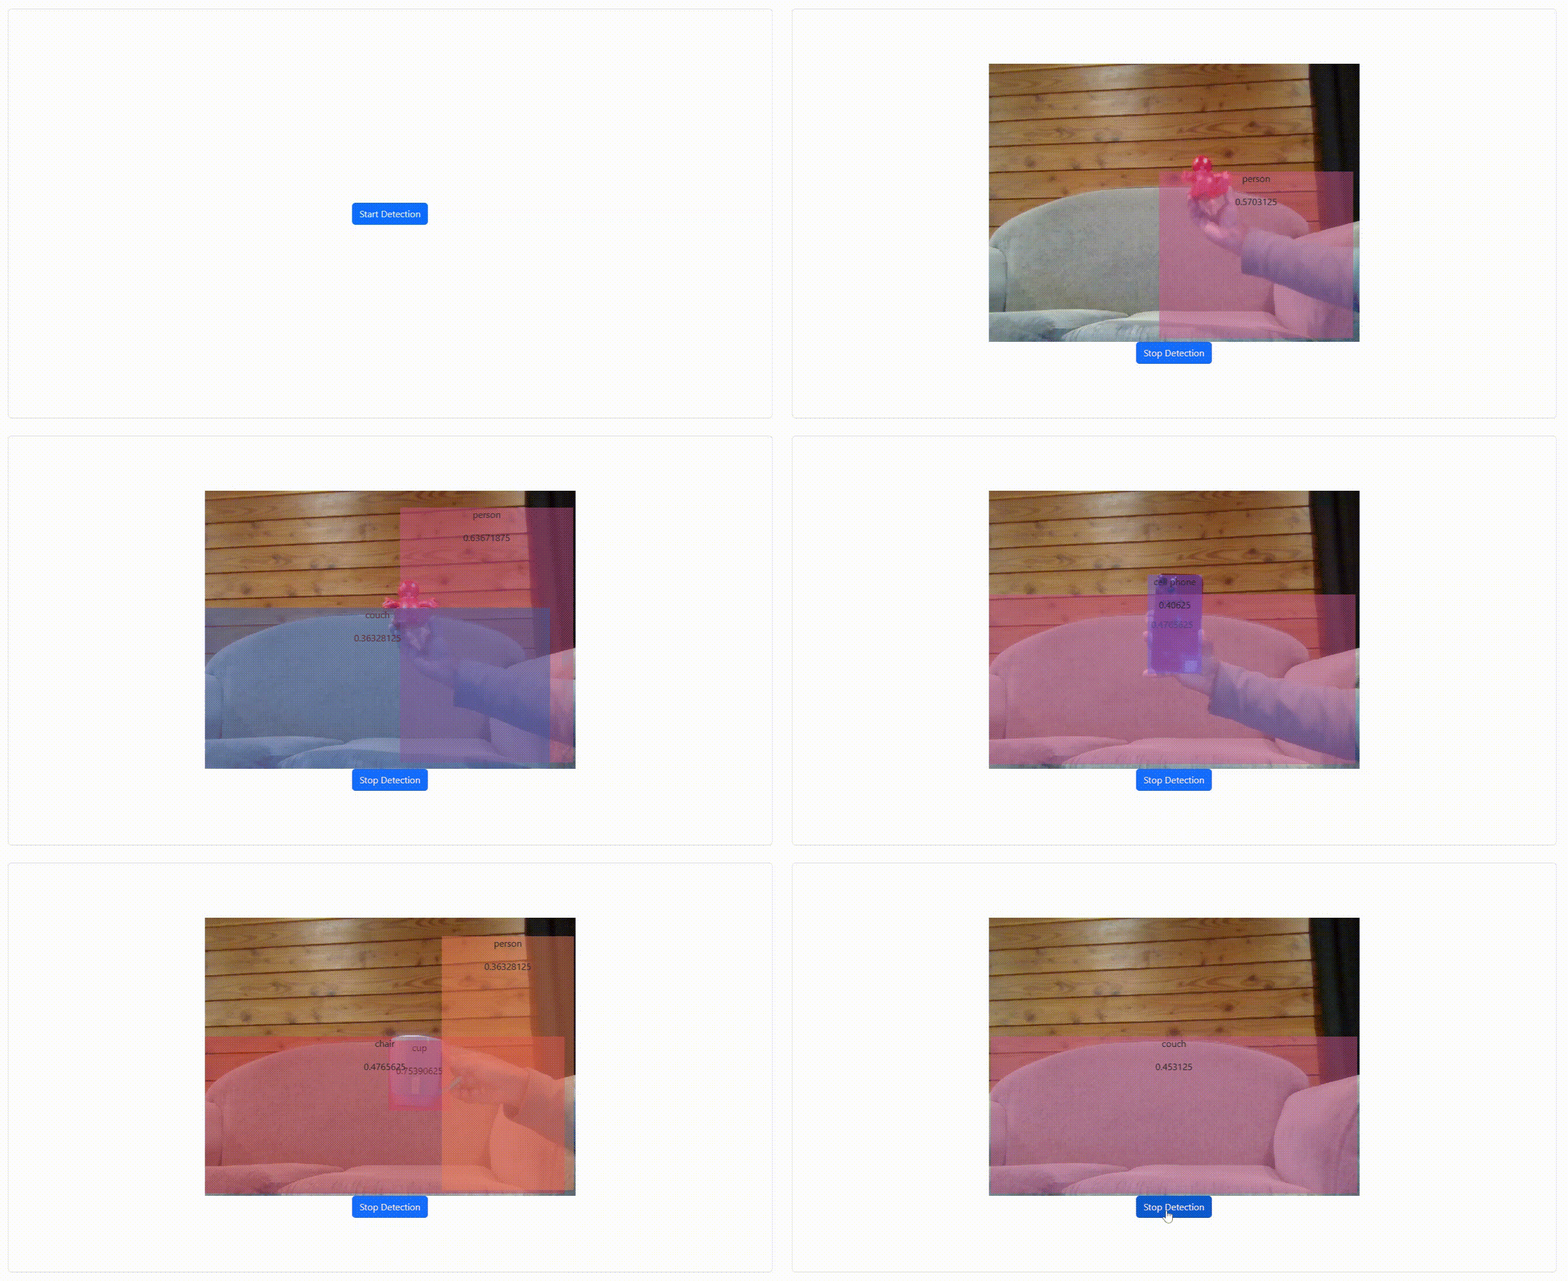
We can delegate displaying the webcam and making detections to a WebcamObjectDetector component. This component should accept an onDetect callback function, so that it can send information about the detected objects. We should also be able to turn on/off the webcam and detection. We will use an isDetectionStarted state variable to store whether we have started detection or not. We will add a button for the user to start/stop detection (and the webcam).
const startDetection = () => {
    console.log('Mount WebcamObjectDetector');
    const objectDetectorProvider = container.get<Provider<IObjectDetector>>(TYPES.IObjectDetector);
    objectDetectorProvider().then(objectDetector => {
        const makeDetections = () => {
            if (
                webcamRef.current !== null &&
                webcamRef.current.video !== null
            ) {
                    console.log('Making detection');
          const detections = objectDetector.detectObjects(webcamRef.current?.video);
          console.log(detections);

          onDetect(webcamRef.current.video.offsetLeft, webcamRef.current.video.offsetTop, 1, detections);
          animationRef.current = requestAnimationFrame(makeDetections);
            }
        };

        makeDetections();
    });
};

const stopDetection = () => {
    if (animationRef.current === undefined) {
        return;
    }
    cancelAnimationFrame(animationRef.current);
};

useEffect(() => {
    if (!isDetectionStarted) {
        stopDetection();
        onDetect(0, 0, 1, []);
    }
}, [isDetectionStarted, onDetect]);
The startDetection function is triggered when the Webcam component is mounted and the user's media (webcam) is successfully accessed. To start detection, we first retrieves an instance of the object detector from the InversifyJS container. Once the object detector is resolved, we create a nested function called makeDetections to periodically detect objects. makeDetections calls the detectObjects method of the objectDetector with the video element obtained from the webcamRef (Webcam component attaches a reference to the internal HTMLVideoElement once it is mounted and the user media is loaded). It then sends the detected objects to the onDetect callback function with additional parameters such as the coordinates of the webcam video and the scale, that are required to accurately draw the bounding boxes. Lastly, it requests to be run at the next animation frame by calling requestAnimationFrame. This creates a loop that continuously performs object detection. The returned request id is assigned to animationRef.current (reference variable, so that it doesn’t cause a re-render), so that it can be used to cancel a request and end the loop.
The stopDetection function checks if the animationRef.current value is undefined. If so, it means we have not started a detection loop. Otherwise, it cancels the animation frame request using cancelAnimationFrame, ending the detection loop.
The useEffect hook is used to setup a side effect to run based on changes in the isDetectionStarted state variable. If isDetectionStarted is false, indicating that the object detection has stopped, the stopDetection function is called. Additionally, it calls the onDetect function with an empty list for detected objects to clear any previously added bounding boxes.
Main React component
import 'reflect-metadata';
import React, { useCallback, useState } from 'react';
import './App.css';
import { DetectedObject } from './services';
import { DetectionMask } from './components/detection-mask';
import WebcamObjectDetector from './components/webcam-object-detector';

function App() {
  const [detectionMasks, setDetectionMasks] = useState<JSX.Element[]>([]);

  const displayDetections = useCallback((baseX: number, baseY: number, ratio: number, detections: DetectedObject[]) => {
    const masks = detections.map((detection, index) =>
      <DetectionMask
        x={baseX + detection.x * ratio}
        y={baseY + detection.y * ratio}
        width={detection.width * ratio}
        height={detection.height * ratio}
        name={detection.name}
        score={detection.score}
        key={index}
      />
    );

    setDetectionMasks(masks);
  }, []);

  return (
    <div
      className="container my-5 rounded border d-flex flex-column align-items-center justify-content-center"
      style={{ 'height': '80vh' }}
    >
      {detectionMasks}
      <WebcamObjectDetector onDetect={displayDetections} />
    </div>
  );
}

export default App;
Next, let’s move on to the main React component. The given code represents the main React component named App. Within this component, we declare a state variable called detectionMasks to hold the bounding boxes of the detected objects. Next, we define a displayDetections callback function to run every time new detections are made. This callback function receives the base coordinates of the webcam view, and information about the list of detected objects. These detected objects are mapped into bounding boxes (DetectionMask components) to be displayed. The bounding boxes are stored in the detectionMasks state using the setDetectionMasks function.
The component's render method renders the detection masks and a WebcamObjectDetector component, which is responsible for displaying the webcam and detecting the objects.
Conclusion
In conclusion, MediaPipe provides a straightforward approach to integrating machine learning into web applications. One primary advantage is that the model runs on your local machine using web assembly. This means you can use this API to process data that should not leave the device. One downside is that only a limited number of models are available.
